1. Add dependency in pom.xml file

Searching and add mybatis

Searching and add mybatis-spring

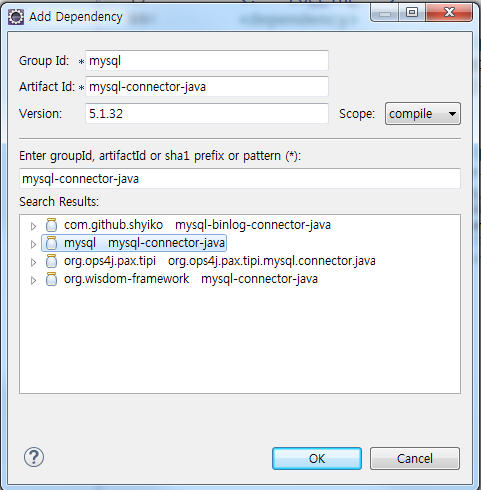
Searching and add mysql-connector-java
Searching and add spring-jdbc

2. Add namespace in root-context.xml file.

Click to src->main->webapp->WEB-INF->spring->root-context.xml and Namespaces tab
3. Add bean
Click to Source tab

Add this code
- <bean id="dataSource"
- class="org.springframework.jdbc.datasource.SimpleDriverDataSource">
- <property name="driverClass" value="com.mysql.jdbc.Driver"></property>
- <property name="url" value="jdbc:mysql://localhost/netplug"></property>
- <property name="username" value="root"></property>
- <property name="password" value="1234"></property>
- </bean>
- <bean id="sqlSessionFactory"
- class="org.mybatis.spring.SqlSessionFactoryBean">
- <property name="dataSource" ref="dataSource"></property>
- <property name="configLocation"
- value="classpath:mybatis/mybatis-config.xml">
- </property>
- </bean>
- <bean id="transactionManager"
- class="org.springframework.jdbc.datasource.DataSourceTransactionManager">
- <property name="dataSource" ref="dataSource"></property>
- </bean>
- <bean id="sqlSession"
- class="org.mybatis.spring.SqlSessionTemplate">
- <constructor-arg ref="sqlSessionFactory"></constructor-arg>
- </bean>
Line4~6 : your mysql setting.
My case schema is netplug and table is 0000dc180000

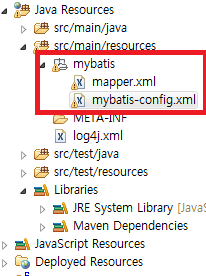
4. mapper config
Make a package for mapper to src->main->resources

package name is mybatis
make xml files
file name is mapper.xml and mybatis-config.xml
mybatis-config.xml
- <?xml version="1.0" encoding="UTF-8"?>
- <!DOCTYPE configuration PUBLIC "-//mybatis.org//DTD config 3.0//EN"
- <configuration>
- <mappers>
- <mapper resource="mybatis/mapper.xml" />
- </mappers >
- </configuration>
mapper.xml
- <?xml version="1.0" encoding="UTF-8"?>
- <!DOCTYPE mapper PUBLIC "-//mybatis.org//DTD Mapper 3.0//EN"
- <mapper namespace= "userControlMapper" >
- <select id ="selectSample" parameterType="java.util.HashMap" resultType= "java.util.HashMap">
- select *
- from 0000dc180000
- </select >
- </mapper>
5. Java coding
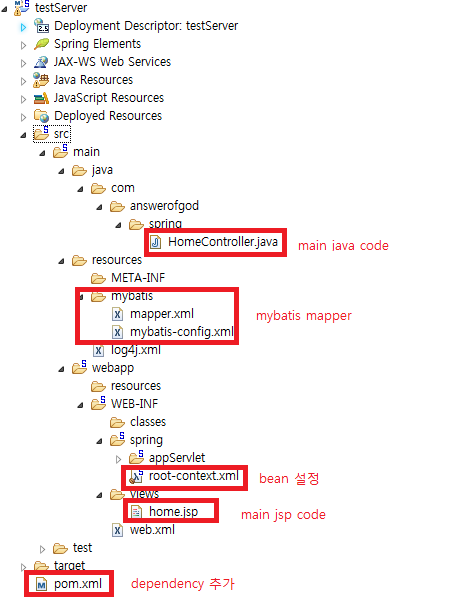
Click to locate src->main->java->com->answerofgod->spring->HomeController.java
Maybe different folder.
com.answerofgod.spring is my package name.
HomeController.java
- @Controller
- public class HomeController {
- private static final Logger logger = LoggerFactory.getLogger(HomeController.class);
- @Autowired
- private SqlSession sqlSession;
- /**
- * Simply selects the home view to render by returning its name.
- */
- @RequestMapping(value = "/", method = RequestMethod.GET)
- logger.info("Welcome home! The client locale is {}.", locale);
- model.addAttribute("serverTime", formattedDate );
- model.addAttribute("showDB", outputs.toString());
- return "home";
- }
- }
add Line 6~7 and Line 23~24
6. JSP coding
Click to src->main->webapp->WEB-INF->views->home.jsp
home.jsp
- <%@ page session="false" %>
- <%@ page contentType="text/html; charset=UTF-8" %>
- <html>
- <head>
- <title>Home</title>
- </head>
- <body>
- <h1>
- Hello world!
- </h1>
- <P> The time on the server is ${serverTime}. </P>
- <p> This is my Database </p>
- <p> ${showDB}</p>
- </body>
- </html>
add Line 14~15
This is my project directory.
run as-> run on server